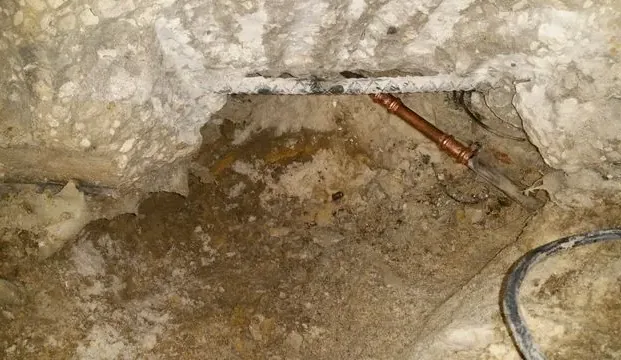
Water appearing at a floor joint in a Stanwood home calls for a careful look at the supply system and the floor itself. The visible damp patch is the beginning of the inspection. Locating a leaking pipe, creating access for its repair and drying the materials above the slab are related jobs with different questions to answer.
Key takeaways
- Describe the wet floor and any observed supply change before assigning a source.
- Let the plumbing investigation establish where access is needed.
- Photograph floor layers and transitions before removal changes their appearance.
- Keep repair openings protected while restoration and plumbing work overlap.
- Check the substrate and retained finishes before replacement flooring is installed.
Describe the floor symptoms before selecting an opening
An owner may notice moisture at a flooring seam, a damp wall base or a patch that returns after wiping. The first report should identify the room and surface involved.
A plumber can then investigate the supply while the restoration team records where escaped water has affected the interior.
The assessment needs to establish the building's actual floor assembly. A room may have a finish over an underlayment or other layers that influence where water appears.
Inspection around transitions, cabinetry and wall edges helps the crew understand which surfaces connect with the wet patch and require further attention.
A slab leak water damage inspection brings the floor findings together with the source investigation. The owner should be able to follow why a particular area needs access.
The plan should identify the evidence used to choose that area and the protection required around it.
- Record where moisture returns after the surface is wiped.
- Photograph floor seams, trim and nearby cabinets.
- Identify any plumbing work already performed in the room.
- Keep loose coverings away from the wet area when removal is safe.
Pipe repair and protection of the room
A repair opening changes how people move through the property. The work area needs a clear boundary, protected nearby belongings and an agreed route for tools and removed material.
These arrangements are especially helpful when the affected floor also connects occupied rooms or provides access to essential household facilities.
The plumber and restoration crew should understand each other's access needs. Pipe repair may require an opening that later provides inspection access to wet edges of the floor assembly.
Closing that opening too early can make the remaining assessment harder and force another disruption when a concealed wet layer is discovered.
Source control belongs in the work record as a specific action. The file can identify the isolated supply, the component repaired and the follow-up check performed by the responsible trade.
That record helps distinguish a completed plumbing task from interior surfaces that still need extraction, cleaning or drying.
- Agree on the route around the open floor before work begins.
- Keep household traffic outside the protected repair boundary.
- Ask which trade will confirm the repaired connection.
- Record when the opening can be safely closed.
Examine the layers exposed at the wet boundary
Water beneath a finished floor can affect more than the visible top surface. The assessment may involve the finish, backing, adhesive, underlayment and adjacent wall materials, depending on what is actually present.
Each observed layer should have a recorded condition and a reason for being retained or removed.
The edge of an opening offers a useful view of how the assembly fits together. Photographs can show moisture beneath the finish and the condition of nearby material that remains in place.
This information helps avoid treating an entire room as a single uniform surface when different layers respond differently.
The crew should also look at the boundaries between flooring types. A transition can conceal the route into an adjoining room or cabinet base.
When readings or visible findings extend the wet area, the room sketch should expand with them so equipment and later repairs address the full observed loss.
- Label the finish material separately from its supporting layer.
- Include wall edges where water reached the base of the room.
- Save photographs of newly exposed surfaces before cleanup.
- Ask for the reason behind each proposed removal area.
Separate accessible liquid from moisture held in materials
Pooled water around a repair opening needs removal before it can continue wetting nearby surfaces. Appropriate water extraction addresses accessible liquid while preserving the safety boundary around the work.
The crew can then reassess edges that were previously hidden beneath the standing water.
The disappearance of the puddle leaves a different task: evaluating moisture held within retained building materials. A dry-looking surface may sit over a wetter layer.
Repeated checks at marked locations help show whether the drying arrangement reaches the material that will eventually support repaired flooring or wall finishes.
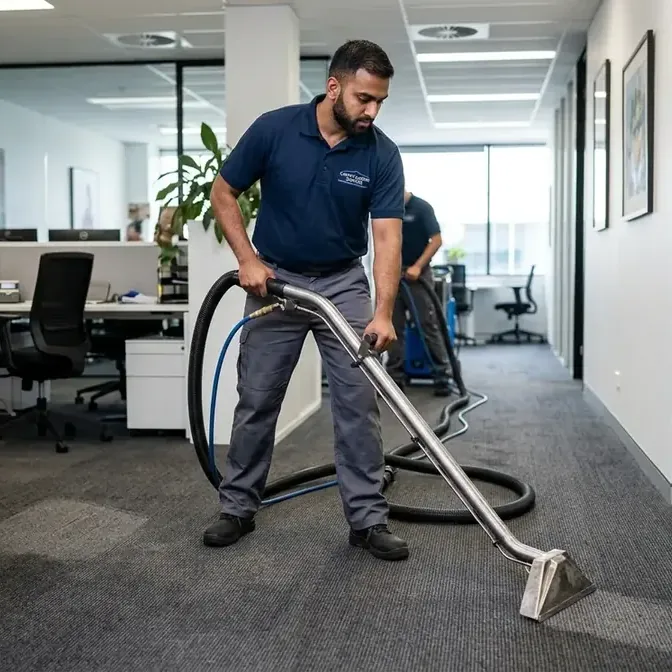
Equipment placement should remain compatible with plumbing access and safe household movement. Hoses, cables and protective barriers need a planned arrangement rather than an improvised path across the opening.
The owner can ask for a simple explanation of which spaces are restricted and who may adjust the setup.
Prepare the substrate for the next flooring decision
The flooring repair conversation depends on the exposed substrate and the condition of retained finishes. Matching the visible surface is only part of that decision.
The repair contractor also needs to know which layers were wet, what was removed and where the assessment found moisture beyond the original pipe access.
During structural drying, monitoring points should correspond to the materials that will remain. The record can distinguish the slab surface, surrounding wall bases and any retained flooring.
That detail supports a more useful discussion than describing the entire room as simply dry or wet.
Replacement work should be planned around the requirements of the selected flooring assembly. The owner can provide the drying file to the installer before scheduling finish work.
Any remaining substrate preparation or source repair task should be identified early so the installation visit starts with a clear scope.
Keep the plumbing and restoration records connected
A floor plan marked with the repair opening is valuable long after the work area is covered. It connects the plumber's description of the repaired pipe with the restoration crew's observations above it.
Photographs taken before, during and after access provide an understandable sequence without relying on a lengthy verbal explanation.
The owner should also retain the list of removed materials and the final readings for surfaces that stayed in place. If an adjacent cabinet, threshold or wall still needs repair, the handoff should identify it by room and location.
A shared naming system reduces confusion between different trade estimates.
The closing conversation can resolve practical details such as responsibility for filling the opening, replacing the floor and reinstalling trim. Those tasks may belong to different providers.
Writing down the remaining assignments gives the household a workable path from a repaired supply pipe to a usable finished room.
Questions
Does damp flooring always require cutting the slab?
Access follows the source investigation and the observed construction. The plumbing professional determines the repair route, while the restoration assessment identifies the interior layers affected by escaped water.
Can the room stay occupied during the work?
Occupancy depends on the opening, equipment arrangement and safe access to the rest of the property. The crew should define the restricted area and explain any temporary changes needed for household movement.
Why check a cabinet beside the wet floor?
Water can reach the cabinet base where it meets the floor. Inspecting that junction helps identify concealed affected material and determines whether the cabinet needs further access or a separate repair task.
Who decides when replacement flooring can begin?
The restoration handoff supplies material conditions and drying records. The flooring contractor uses those findings with the selected product's installation requirements and the condition of the prepared substrate.
What if moisture appears again after the pipe repair?
A returning wet patch should be documented and reported to the responsible professionals. Follow-up inspection can check the repair and inspect retained layers before finish work conceals the area.